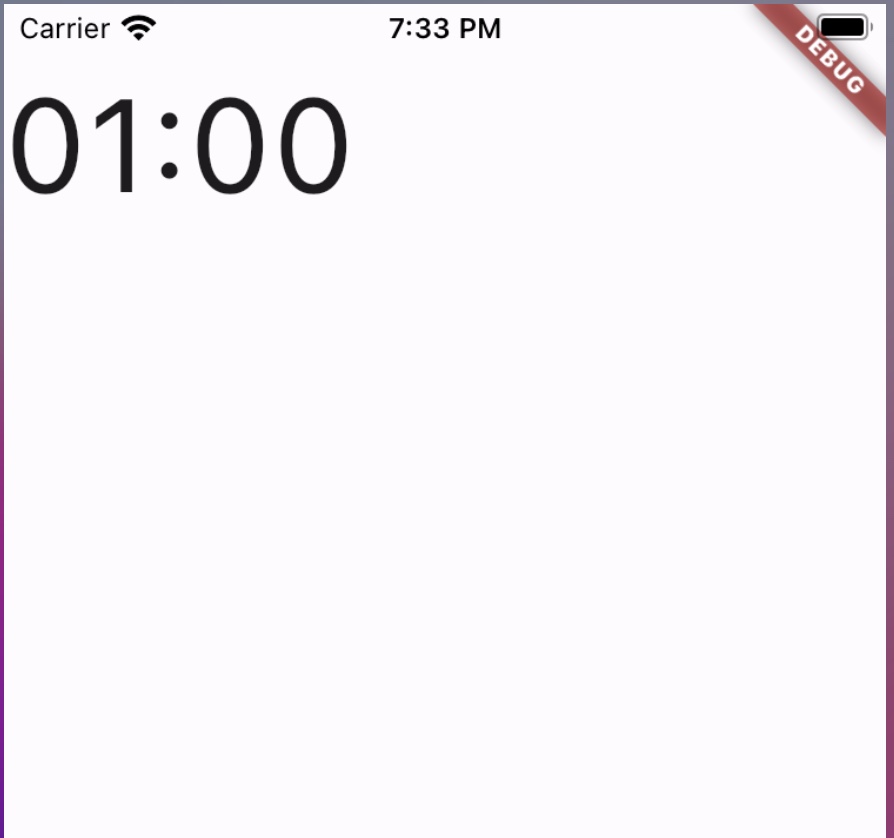
Flutterを使ってタイマー(Timer)を作成してみます。
ただStatefulWidgetを使ってタイマー(Timer)を作成することもできますが、単一責任の原則を意識するためにflutter_riverpodを使ってタイマー(Timer)を作成してみます。
実装方法
以下の3Stepで実装を進めていきます
- Timerクラスで作成した時間を表示する
- flutter_riverpodでロジック分離する
- スタート・リセットボタンを追加
Timerクラスで作成した時間を表示する
事前にflutter_riverpodをインストールしておいてください。
flutter pub add flutter_riverpodまずはタイマークラス(Timer)にて定義された変数を画面に表示してみます。
import 'dart:async';

import 'package:flutter/material.dart';
import 'package:flutter_riverpod/flutter_riverpod.dart';

void main() {
  runApp(
    ProviderScope(
      child: const MyApp(),
    ),
  );
}

class MyApp extends StatefulWidget {
  const MyApp({super.key});

  @override
  State<MyApp> createState() => _MyAppState();
}

class _MyAppState extends State<MyApp> {
  Timer? timer;
  Duration timerDuration = Duration(minutes: 1);
  String strDigits(int n) => n.toString().padLeft(2, '0');

  @override
  Widget build(BuildContext context) {
    return MaterialApp(
      title: 'Flutter Demo',
      theme: ThemeData(
        colorScheme: ColorScheme.fromSeed(
          seedColor: Colors.deepPurple,
        ),
        useMaterial3: true,
      ),
      home: Scaffold(
        body: SafeArea(
          child: Text(
            strDigits(timerDuration.inMinutes.remainder(60)) +
                ':' +
                strDigits(timerDuration.inSeconds.remainder(60)),
            style: TextStyle(
              fontSize: 56,
            ),
          ),
        ),
      ),
    );
  }
}

flutter_riverpodでロジック分離する
上記でタイマーの表示はできました。
ただ、ロジックと画面描画が同じファイルにあることが処理を分かりづらくします。
そこで、ロジック部分の処理をmodelに画面描画をviewに分けることを行います。
main.dart
import 'package:flutter/material.dart';
import 'package:flutter_riverpod/flutter_riverpod.dart';

import 'home/view.dart';

void main() {
  runApp(
    ProviderScope(
      child: const MyApp(),
    ),
  );
}

class MyApp extends StatelessWidget {
  const MyApp({super.key});

  @override
  Widget build(BuildContext context) {
    return MaterialApp(
      title: 'Flutter Demo',
      theme: ThemeData(
        colorScheme: ColorScheme.fromSeed(
          seedColor: Colors.deepPurple,
        ),
        useMaterial3: true,
      ),
      home: Home(),
    );
  }
}
model.dart
import 'dart:async';

import 'package:flutter/material.dart';
import 'package:flutter_riverpod/flutter_riverpod.dart';

final timerProvider = ChangeNotifierProvider((ref) => TimerModel());

class TimerModel extends ChangeNotifier {
  Timer? timer;
  Duration timerDuration = Duration(minutes: 1);
  String minutes = "00";
  String seconds = "00";

  TimerModel() {
    featch();
  }

  void refresh() {
    String strDigits(int n) => n.toString().padLeft(2, '0');
    minutes = strDigits(timerDuration.inMinutes.remainder(60));
    seconds = strDigits(timerDuration.inSeconds.remainder(60));
    notifyListeners();
  }
view.dart
import 'package:flutter/material.dart';
import 'package:flutter_riverpod/flutter_riverpod.dart';
import 'package:tmp_blog/home/model.dart';

class Home extends ConsumerWidget {
  const Home({
    super.key,
  });

  @override
  Widget build(BuildContext context, WidgetRef ref) {
    final TimerModel timerModel = ref.watch(timerProvider);
    return Scaffold(
      body: SafeArea(
        child: Text(
          timerModel.minutes + ':' + timerModel.seconds,
          style: TextStyle(
            fontSize: 56,
          ),
        ),
      ),
    );
  }
}
スタート・リセットボタンを追加
タイマーをスタート・ストップするボタンを追加します。
タイマーを始めるときはボタンの表示を「Start」にし、
タイマーが進んだときは「Stop」を表示するように制御します。
上記の制御はタイマーが1分の時に「Start」、1分ではない時に「Stop」にするようにしていますが、
スタートの直前で連続して押下するとその判定がバグってしまいます。
そのために連続して押下できないような制御をフラグを使って実装しています。
model.py
import 'dart:async';

import 'package:flutter/material.dart';
import 'package:flutter_riverpod/flutter_riverpod.dart';

final timerProvider = ChangeNotifierProvider((ref) => TimerModel());

class TimerModel extends ChangeNotifier {
  Timer? timer;
  Duration timerDuration = Duration(minutes: 1);
  String minutes = "00";
  String seconds = "00";

  bool isDisabledButton = false;
  String buttonDisplay = "start";
  Color foregroundColor = Color.fromARGB(255, 255, 199, 0);
  Color backgroundColor = Color.fromARGB(255, 253, 251, 240);

  TimerModel() {
    _refresh();
  }

  void _refresh() {
    String strDigits(int n) => n.toString().padLeft(2, '0');
    minutes = strDigits(timerDuration.inMinutes.remainder(60));
    seconds = strDigits(timerDuration.inSeconds.remainder(60));
    notifyListeners();
  }

  void setCountDown() {
    final reduceSecondsBy = 1;
    final seconds = timerDuration.inSeconds - reduceSecondsBy;
    if (seconds < 0) {
      timer!.cancel();
    } else {
      timerDuration = Duration(seconds: seconds);
    }
  }

  void start() {
    timer = Timer.periodic(Duration(seconds: 1), (_) {
      setCountDown();
      isDisabledButton = false;
      _refresh();
    });
  }

  void reset() {
    timer!.cancel();
    timerDuration = Duration(minutes: 1);
    isDisabledButton = false;
    _refresh();
  }

  void doStartOrReset() {
    // 連続して押下することを回避
    if (isDisabledButton) {
      return;
    }
    isDisabledButton = true;
    if (timerDuration == Duration(minutes: 1)) {
      start();
      buttonDisplay = "Reset";
      foregroundColor = Color.fromARGB(255, 113, 113, 113);
      backgroundColor = Color.fromARGB(255, 253, 251, 240);
    } else {
      reset();
      buttonDisplay = "Start";
      foregroundColor = Color.fromARGB(255, 255, 199, 0);
      backgroundColor = Color.fromARGB(255, 253, 251, 240);
    }
    notifyListeners();
  }
}
view.py
import 'package:flutter/material.dart';
import 'package:flutter_riverpod/flutter_riverpod.dart';
import 'package:tmp_blog/home/model.dart';

class Home extends ConsumerWidget {
  const Home({
    super.key,
  });

  @override
  Widget build(BuildContext context, WidgetRef ref) {
    final TimerModel timerModel = ref.watch(timerProvider);
    return Scaffold(
      body: SafeArea(
        child: Center(
          child: Column(
            mainAxisAlignment: MainAxisAlignment.center,
            children: [
              Text(
                timerModel.minutes + ':' + timerModel.seconds,
                style: TextStyle(
                  fontSize: 56,
                ),
              ),
              ElevatedButton(
                onPressed: () {
                  timerModel.doStartOrReset();
                },
                child: Text(timerModel.buttonDisplay),
                style: ElevatedButton.styleFrom(
                  foregroundColor: timerModel.foregroundColor,
                  backgroundColor: timerModel.backgroundColor,
                ),
              )
            ],
          ),
        ),
      ),
    );
  }
}


コメント